
Creating Custom Hand-Drawn Flower Templates: A Step-by-Step Guide
In this step-by-step guide I will show you how to create hand-drawn technical flower designs that you can use to create your own unique floral jewellery. You do not need any technical or complicated computing skills to create beautiful flower designs, just a few household items and your creativity!
Materials you’ll need
A pencil - sticky-backed paper - or regular paper and pritt stick - tracing paper or baking parchment - a compass - a protractor - a pen - a ruler - vernier gauge (optional)

If you’re using one, measure the gemstone for the centre of the flower design before you begin
Step 1: Sizing your flower for a gemstone centre (optional)
To design a piece of flower jewellery with a gemstone at its centre, begin by measuring the gemstone and add to that measurement the thickness of your setting x2 to find out the diameter of the centre circle you need to draw.
For example: if you’re using an 8mm gemstone with a 0.3mm bezel setting the equation would be:
Gemstone diameter + bezel thickness + bezel thickness = diameter of the centre circle
8mm + o.3mm + 0.3mm = 8.6mm
So you would use your compass to draw an 8.6mm circle in the centre of your page.
If you’re not sizing your flower for a gemstone, the size of your centre circle is up to you!

Draw the outline of the flower design with a compass
Step 2: Drawing a circle outline
Use your compass to draw the centre circle of your flower in the middle of your piece of paper, then place the point of the compass back in the same place and draw a second larger circle that represents the outside edge of your flower. This size is completely up to you.
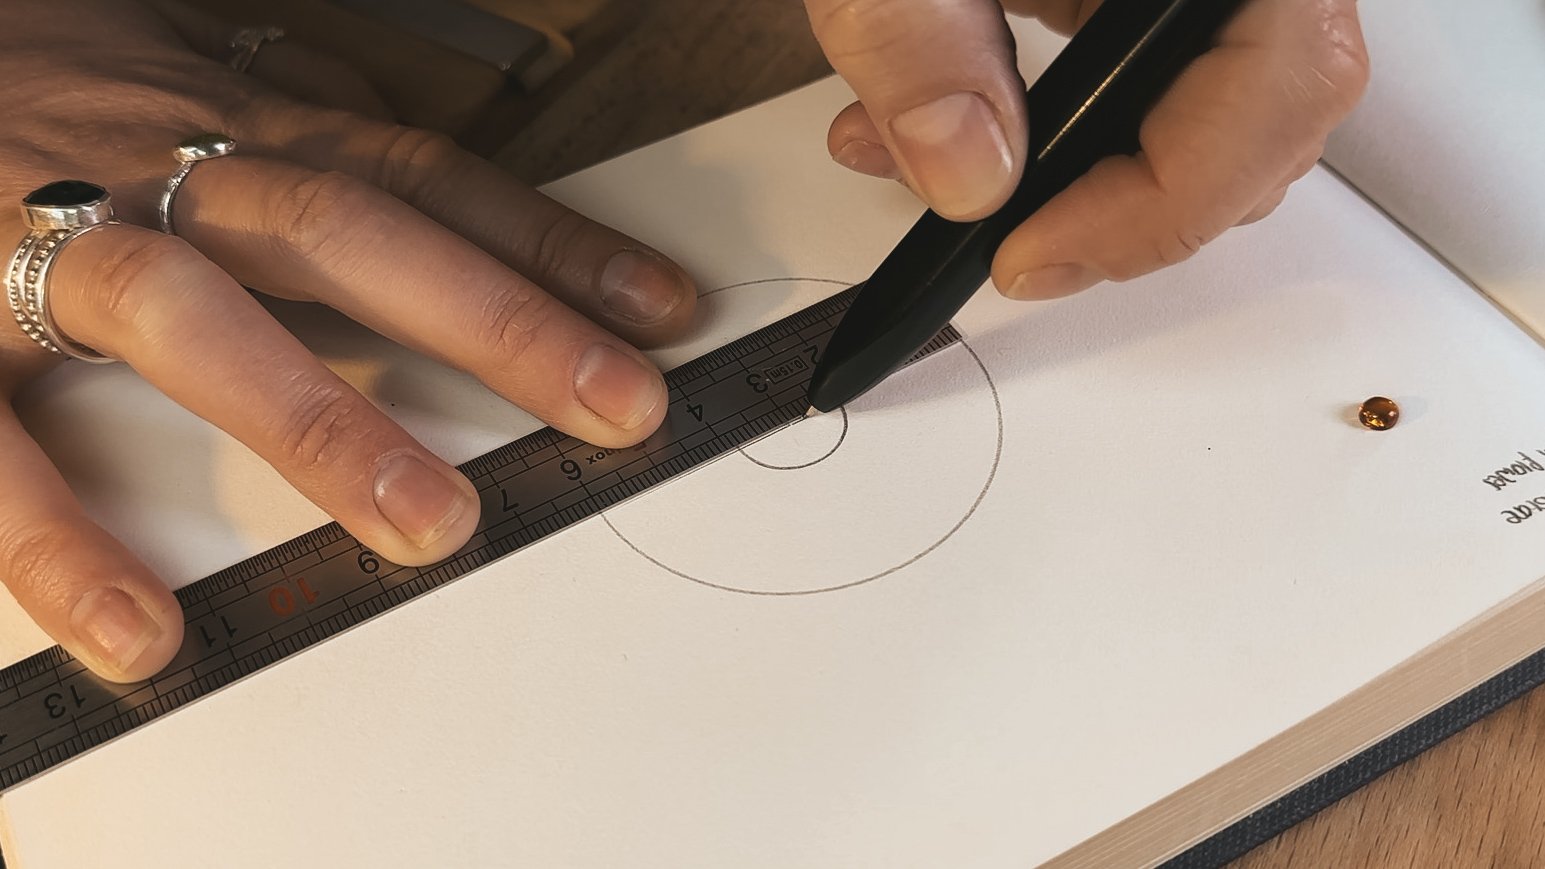
Draw a line across the centre for an even number of petals
Step 3: Decide how many petals you would like
Now decide how many petals you would like on your flower.
For an even number of petals draw a line with your ruler across the centre of the circle so that it crosses the centre dot made by your compass.
For an odd number of petals draw a line with your ruler from the centre dot made by your compass to the outside edge of your larger circle.

Mark out each segment using a protractor
Step 4: Mark out each petal segment
To work out the size of each petal segment you need to do some maths. A circle has 360° (degrees) in total, so you need to divide 360° by the number of petals you would like on the flower to ensure even spacing all the way around.
For example: if you are drawing a flower with 8 petals you’ll need to divide 360° by 8
360° ÷ number of petals = degrees between each petal segment
360° ÷ 8 = 45°
So you would use your protractor to mark 45° points around the circle.
Once you have worked out the degrees between each segment place your protractor on the line that you drew in step 3 with the centre dot and line of the protractor over the centre dot and line of you circle. Follow the number from 0 to the number of degrees you need (in this case 45°) and mark it with your pencil. Keep counting around the circle, marking the number of degrees for each petal until you get back to the start.
Use a ruler to join the marks up with the centre dot of the circle.
NB: for an even number of petals, as each petal will be opposite another one, you only need to mark half your circle and then draw a line that passes through the centre dot across the diameter of the circle. For an odd number of petals, only draw a line from the outside edge to the centre point as the petals will not sit directly opposite one another.


Mark the centre of each segment so that you can line up each petal accurately
Step 5: Mark the centre of each segment
To make sure you are able to line up each of your petals is in the centre of each segment, place your ruler across the widest part of each segment and mark the centre.
NB: for an even number of petals, as each petal will be opposite another one, you only need to mark half your segments and then line up your ruler so that it passes through the centre dot across the diameter of the circle and use it to mark the opposing side. For an odd number of petals, you will need to measure and mark the centre of each segment

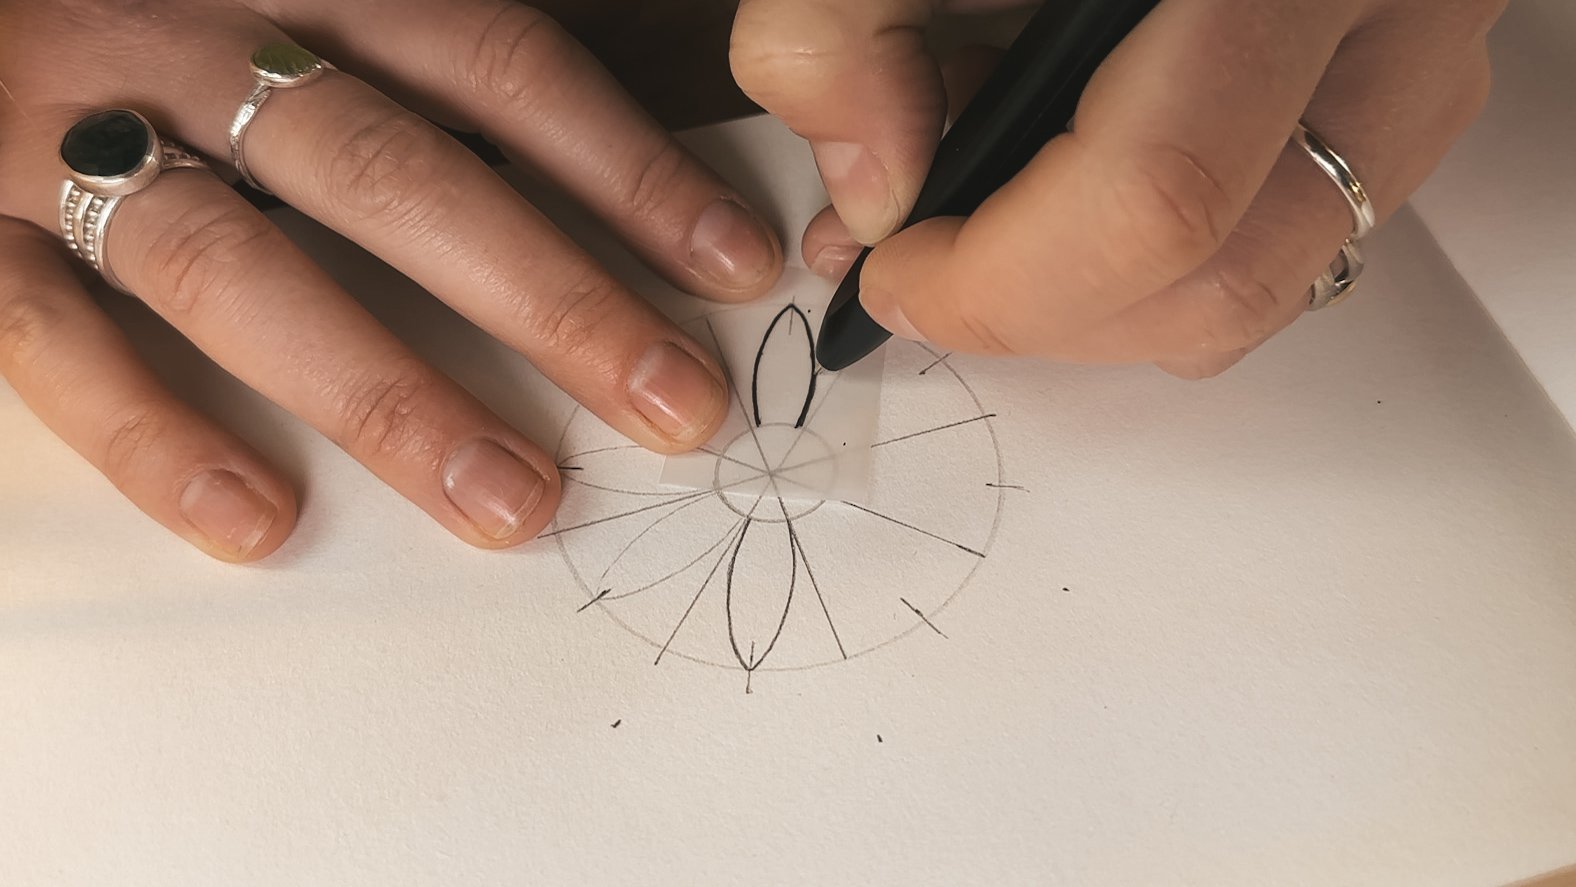
Create even petals with the help of tracing paper or baking parchment
Step 6: Draw your first petal
Working on one side of one segment only, and using the centre point as your guide, draw one half of your petal design. Place a small piece of tracing paper over the first half of your petal, trace the line with your pencil, turn the tracing paper over and use it to transfer the first pencil line onto the other side creating a perfectly symmetrical petal.
Note: this will only work with a pencil, not a pen.
Use tracing paper to draw equal petals all the way around the circle
Step 7: Trace the petal into each segment
Trace the full outline of the first petal onto the tracing paper with your pencil, turn it over again so that the graphite side is facing down and place it onto the second segment. You should find that it fits perfectly into the space.
Trace the petal into each segment to transfer the petal design all the way around.

Use a pen to trace the lines so that you can see them more clearly
Step 8: Trace the outline with a pen
The traced petals might be faint so once you have traced them carefully re-draw the lines in pen (this will enable you to see the design clearly when piercing it out).
And voila! your design is ready to attach to your metal sheet and create your own unique flower jewellery!
Ready to use your design skills in a project?

ONLINE JEWELLERY COURSE | Gemstone Flower Stud Earrings

